
Ecommerce Product Photography Setup and Shooting Workflow
An ecommerce product photography setup should be a repeatable baseline: prepare the product and shot list, position the background, product, lights and camera, take a test shot, then lock or record the approved positions before batch capture. There is no universal spacing; camera distance, light placement and background clearance should be set for the product size, surface reflectivity, required framing and available working space, then verified in the test image.
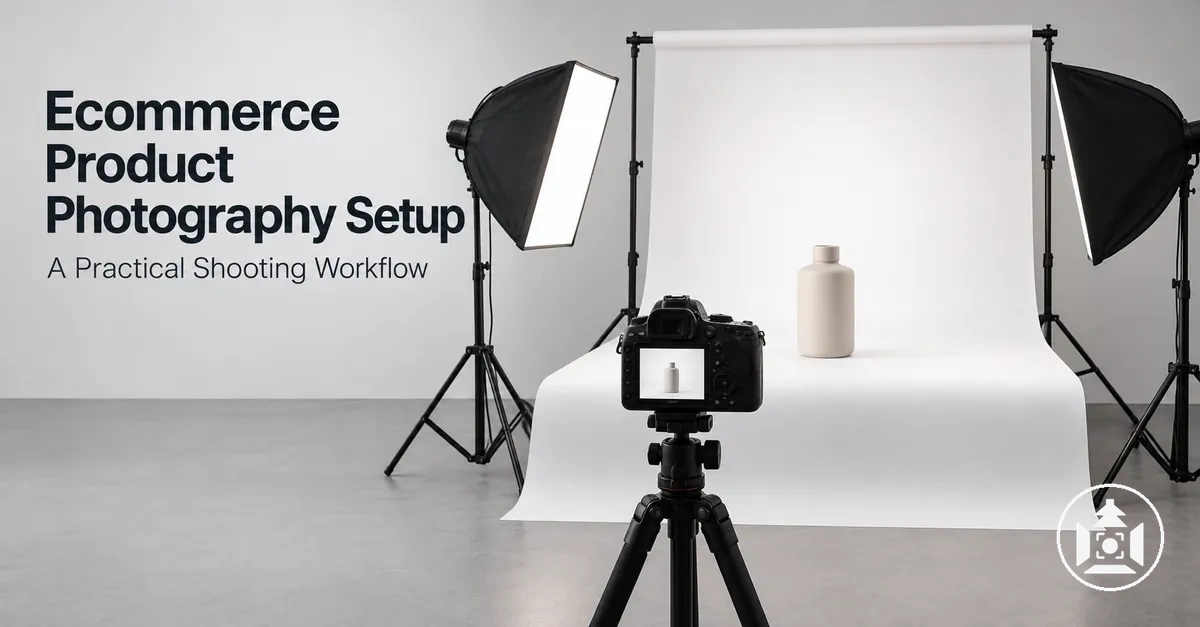
Repeatable setup control map
Use this sequence to establish one approved shooting baseline, apply it consistently, and know when a product change requires a deliberate reset and retest.
- PrepareReady when products are camera-ready, required views are defined, and the workspace can accommodate the planned setup.
- PositionReady when the background fills the intended frame, the product is stable, lights are secured, and the camera position produces the required view.
- Test and lockApprove the baseline only after a test image passes the required framing, focus, background, shadow/reflection, support-visibility and position checks.
- Capture consistentlyFollow the shot list, reset each product to the reference state, and document any deliberate deviation that changes the approved setup.
- Verify before breakdownKeep the setup intact until every product and planned view is present, files are readable, and critical captures have passed review or been recaptured.
Adjustment rule: if product size, shape, reflectivity, orientation, framing or lighting conditions change the result, adjust only the necessary variable, record the new state and take another test shot before continuing.
Treat the physical arrangement as conditional rather than fixed: product dimensions, surface behaviour, required views and working space determine how much room the camera, background and lighting need.
Treat the product, background, lighting and camera as one connected geometry. Moving any one of them can change framing, background coverage, shadows, reflections or the clearance available to the other components.
Use the test shot as the approval point for that geometry: inspect the intended framing, focus, background, visible supports, shadows, reflections and obvious exposure problems, then retest after any deliberate adjustment.
Once the result is approved, reference marks and recorded measurements define the repeatable baseline, making accidental movement easier to distinguish from an intentional setup change.
Larger, smaller, reflective or differently presented products may require a controlled deviation from the baseline. Change the necessary variable, record the new state and verify it again rather than forcing every product through unchanged geometry.
Repeatability also depends on keeping relevant capture conditions stable: if light output, ambient light, camera settings or product presentation changes materially, treat the setup as changed and verify the result again before continuing.
With that baseline in mind, prepare the products, required views and shooting area before assembling the physical setup.
Table of Contents
Prepare the Products, Shot List, and Shooting Area
Shoot preparation should establish three things before equipment assembly begins: products are ready to photograph, the shot list defines the required views, and the shooting area can accommodate the planned work.
Product preparation should account for product condition and product size, while workspace readiness should reflect the space, access, power, and environmental control needed for the particular products and setup.
Check each product for visible condition issues before it enters the capture workflow, and group products by a useful shoot characteristic such as size or type when that reduces unnecessary setup changes.
Define the required views in the shot list before shooting so the capture order can cover the planned imagery without relying on memory.
Confirm that the shooting area can hold the product, background, camera support, lights and modifiers while leaving unobstructed access for positioning and adjustments. Provide suitable power for the actual powered equipment, route cables so they do not interfere with movement or stand placement, and control ambient light when it would change the planned illumination.
Readiness is verified when the product condition and size have been assessed, the planned views and capture order are defined, and the workspace can accommodate the complete setup with usable adjustment access. Room size, shot count and electrical demand are setup-specific values, not universal requirements.
The readiness check separates product readiness, shot-list readiness, and shooting-area readiness so each prerequisite can be verified before assembly.

- Product readiness: Check each product for visible condition issues that need attention before photography.
- Product readiness: Identify product size and handling needs so the planned shooting area can accommodate the product and practical positioning.
- Product readiness: Group products by a relevant characteristic, such as similar size or type, when that makes the planned capture order more practical.
- Shot-list readiness: Define the required views for each product or product group before capture begins.
- Shot-list readiness: Arrange the shot list into a usable capture order and confirm that the planned views provide the intended coverage.
- Shooting-area readiness: Confirm sufficient space for the product, planned setup, and access needed for positioning and adjustments.
- Shooting-area readiness: Confirm suitable access to power when the planned equipment requires it.
- Shooting-area readiness: Check that relevant environmental conditions can be controlled sufficiently for the planned shoot rather than changing unpredictably during capture.
Clean, Stage, and Group Products in Shooting Order
Make each product camera-ready by checking its surface condition, assembly state, and orientation, then group and queue products according to characteristics that affect the shoot.
Clean visible dust or fingerprints, stage the intended orientation, and establish a shooting order before capture to reduce avoidable handling and unnecessary setup changes.
Use size, product type, orientation, and shot requirements as grouping criteria only when they change preparation or the setup needed for capture.
For example, products with similar dimensions or required views may be grouped together when that allows fewer setup changes, but similar products can still require different treatment.

- Clean the product: Check the visible surface condition and address obvious dust, fingerprints, or other visible contamination so these issues are not carried into capture.
- Stage the product: Confirm the intended assembly state and orientation so the product enters the shooting queue camera-ready for its required views.
- Group by setup-relevant characteristics: Place products together when characteristics such as size, type, orientation, or shot requirements call for similar preparation or setup conditions.
- Queue the shooting order: Arrange the product batch in a practical capture sequence that can reduce unnecessary handling and setup changes while still allowing different products to receive different treatment where required.
Confirm the Required Equipment Before Assembly
Confirm equipment readiness by function before assembly: a capture device such as a camera or smartphone records the images, a stable support such as a tripod stabilizes the capture device, lighting hardware illuminates the product, background support holds the chosen background, a shooting surface supports the product, and suitable power serves equipment that requires it.
Accessories are prerequisites only when the planned workflow depends on the control they provide; otherwise, they remain optional workflow aids.

- Capture device: Confirm the camera or smartphone is present, usable, and able to provide the required capture function for the planned shoot.
- Stable support: Confirm a tripod or other suitable camera support is available when the setup requires a fixed camera position and protection against unintended camera movement.
- Lighting: Confirm the planned lighting hardware and any supports needed to hold it are present and usable for illuminating the product.
- Background support: Confirm the planned support can hold the background in the position required by the setup.
- Shooting surface: Confirm the surface can support and position the product as required for capture.
- Power: Confirm suitable power is available for the specific lighting or other equipment in the setup that requires an external power source.
- Control accessories: Confirm only the accessories needed to control the planned workflow, such as a required remote capture or positioning aid; accessories that do not serve a required setup function are optional rather than prerequisites.
Build the Shooting Setup Around the Product
Build the shooting setup around product dimensions, reflectivity, required framing and available working space rather than a universal equipment layout.
These conditions determine workable support height, background clearance, light placement and camera distance. Increase clearance when a larger product or modifier needs more room, when framing requires greater camera distance, or when reflective surfaces need more freedom to reposition lights; reduce spacing only when the complete setup still fits and the test image remains acceptable.
The background position, product position, lighting position, and camera position are interdependent: moving one can change coverage, framing, available clearance, or the space available for another component.
Compact products often allow tighter geometry; larger products usually need more working clearance for framing, background coverage and light placement. The usable spacing is the spacing that accommodates the required view and can be reproduced after testing.
Where a dedicated room is unavailable, product photography without a studio can use the same product-centred setup logic within the constraints of the available space.
The setup geometry is ready for testing when the product is supported, the background covers the required frame, the lights and camera fit within the working area, and each position can be adjusted without obstructing the others.

- Establish the product position: Place the product on the intended support and use its dimensions, orientation, surface behavior, and required framing to define the space the physical setup must accommodate. Check that the product is stable and that enough working space remains for the background, lights, and camera.
- Position the background: Align the background behind and around the product with enough coverage and clearance for the required frame. Check that its position does not interfere with the product support or prevent practical access for later adjustments.
- Place the lighting: Position the lighting hardware around the established product and background positions, adjusting light placement to the product dimensions, reflectivity, and available space. Check that the lights can illuminate the product from the planned positions without obstructing the required camera position.
- Set the camera position: Place the camera at a distance and height that can accommodate the required framing while remaining within the available working space. Check that the camera position does not conflict with the lights, background support, or access to the product.
- Check the complete setup geometry: Review the product position, background position, light placement, camera distance, clearances, and working access as one equipment layout. Adjust the affected positions when one component restricts another, then proceed to testing once the required framing and physical access are workable.
Position the Background and Product
Position the background so its coverage extends through the planned framing without exposing an unintended visible edge or seam, then establish a stable, reproducible product position within that background field.
Support and align the product in its intended orientation, with centering determined by the required frame rather than treated as a universal placement rule.
Clearance is adequate when the background still fills every planned frame, the product can be positioned for the required views without contacting the background or supports, and any support intended to remain hidden stays outside the visible frame.
Use reference marks for the product position or orientation when the product may need to be reset to the same placement during the shoot; the exact marks and clearance depend on the product and framing.
These checks establish the physical placement requirement, while choosing a product photography background is a separate decision about the background itself.

- Coverage: Check that the background fills the planned frame around the product without an unintended edge or seam becoming visible.
- Stability: Check that the product support holds the intended product position and orientation without unwanted movement.
- Clearance: Check that the space between the product and background accommodates the product geometry and planned framing without prescribing one universal distance.
- Repeatability: Mark the required product position or orientation when a reset may be needed, so the reference marks provide a consistent placement point during the shoot.
Place and Secure the Lighting
Place the chosen lights on stable light stands and secure each stand, light, and modifier so the lighting position remains controlled during batch capture.
Treat each approved light position as a repeatable set of values: stand location, light height, angle and modifier position; when light output is adjustable, keep its approved output consistent as well. Change these values only deliberately and retest when the visible result changes.
Changes in distance, height, angle, or modifier position can affect illumination, shadows, and glare, with the visible result depending on the light source and the product surface.
If a position change alters a shadow or reflection, adjust the relevant light and then secure its new position before continuing the product set.
This subsection covers physical placement and stability; methods for lighting an ecommerce product shoot are handled separately.
- Place the light stands: Position each stand within the available working space and check that it remains stable without obstructing the product or camera position.
- Set the lighting position: Raise, lower, angle, or change the distance of each light according to the illumination needed for the current product, then check the resulting shadow and reflection behavior.
- Position the modifier: Place the chosen modifier securely relative to its light source and check that its position remains controlled during capture.
- Secure the setup: Tighten the relevant stand, light, and modifier controls so the established positions do not shift unintentionally during the batch.
- Verify repeatability: Check the fixed lighting positions before continuing capture, and after any deliberate adjustment, so unintended movement can be distinguished from a planned change.
Mount the Camera and Establish a Fixed Shooting Position
Mount the camera on a stable tripod or other suitable support, then establish a repeatable position by fixing the camera height, distance, angle, and orientation relative to the product.
The exact geometry should match the product size and required view, while support stability keeps unintended camera movement from changing the established position.
Check the framing from the fixed shooting position and adjust the camera placement until the required product view is established. A practical reconstruction reference is the tripod footprint plus camera height; when those do not uniquely reproduce the frame, also record camera-to-product distance, camera angle or the lens/focal-length choice used for that view.
For example, recording the tripod position and camera height provides reference points for returning the camera to the same physical relationship with the product.
Once the camera geometry and framing are physically fixed, camera settings for ecommerce photography are a separate capture-control step.
- Stabilize the camera: Secure the camera to the tripod or support and check that the support remains stable at the intended shooting position.
- Establish the geometry: Position and align the camera at the height, distance, angle, and orientation required for the planned product view, then check the resulting framing.
- Record the repeatable position: Note or mark the relevant physical reference points for the camera and tripod so the fixed shooting position can be reconstructed if the setup is reset.
Test and Lock the Setup Before the Full Shoot
Use a test shot to validate the assembled setup as a system before applying it to the full product set.
Lock the setup as the baseline only after the test result passes the required framing, focus, background, shadow/reflection, visible-support and fixed-position checks and can be reproduced without unintended changes.
Framing, focus, background condition, shadows, reflections, visible support, and fixed positions are observable setup checks rather than definitive diagnoses of one cause.
An observed defect identifies a relevant variable to inspect but does not prove that variable caused the defect, because more than one setup condition can produce a similar visible result.
Adjust only the setup variable that the check indicates should be inspected, take another test shot, and compare the result.
Confirm the baseline as repeatable when the approved result can be reproduced with the intended fixed positions unchanged.
- Framing: Check that the required product view is contained within the frame; incomplete or shifted framing indicates that product or camera position should be inspected, adjusted where necessary, and retested.
- Focus: Check whether the required product detail appears in focus in the test shot; missing focus indicates that camera focus or physical stability should be inspected before the baseline is accepted.
- Background: Check for unintended visible edges, seams, marks, or support elements in the background; their presence indicates that background coverage, placement, or cleanliness should be inspected.
- Shadows: Check for unwanted shadow behavior that conflicts with the intended baseline; an unwanted shadow suggests inspecting relevant light placement or product position rather than assuming one definitive cause.
- Reflections: Check for unwanted reflections or glare on the product; their presence suggests inspecting the relationship between the product surface, light placement, and camera position before making an adjustment.
- Visible support: Check whether product supports or other setup hardware appear unintentionally in the frame; visible support indicates that its placement, the product position, or framing should be inspected.
- Fixed positions: Check that the intended product, camera, lighting, and background positions remain stable between validation shots; unintended movement means the affected position should be restored or secured before retesting.
- Repeatable baseline: After any adjustment, take another test shot and compare it with the approved result. Treat the setup as locked only when the required checks pass and the baseline can be reproduced without unintended position changes.
Use Test Shots to Confirm the Setup
Start with one test shot before batch shooting. If a physical setup variable needs adjustment, change that variable deliberately, take another test shot and repeat the comparison until the required checks pass.
Check the visible framing, focus, background appearance, shadow placement, glare, product orientation, and gross exposure as signals of setup condition rather than assuming that any one result identifies a single cause.
Separate what is visible in the test capture from the variable you choose to inspect.
For example, glare on the product may suggest checking light placement, camera position, product orientation, or their relationship rather than proving that one light is responsible.
Change only the suspected setup variable, take another test shot, and compare the result before making further adjustments.
- Framing: If the intended product view is cropped, shifted, or includes unintended space, check the camera position or product position and retest after the minimum required adjustment.
- Focus and orientation: If required product detail is not in focus or the product orientation differs from the intended view, check camera focus, support stability, or product placement before retesting.
- Background appearance: If an unintended edge, seam, mark, or support is visible, check background placement, coverage, or product position rather than assuming one definitive cause.
- Shadow: If shadow placement differs from the intended result, inspect the relevant light position, product position, or their relationship and retest after one targeted adjustment.
- Glare: If glare or an unwanted reflection appears, inspect the relationship between the product surface, light placement, camera position, and product orientation before changing one variable.
- Exposure: If the test shot is grossly too bright or too dark for useful setup evaluation, check the relevant capture or illumination variable, make the minimum adjustment needed for validation, and retest without expanding into detailed exposure correction.
Mark Fixed Positions for Repeatable Shooting
Mark or record the fixed positions of the approved setup so its physical geometry can be maintained during the shoot or rebuilt after it has been moved.
Use reference marks for the product center, tripod position, light-stand position, and background placement, and record camera height or another measurement when a physical mark alone does not preserve the required spatial relationship.
Each reference point should correspond to the setup variable it stabilizes: the product center records placement, the tripod position and camera height help reconstruct camera geometry and framing, light-stand positions preserve the approved light placement, and background placement records its relationship to the product.
For example, a tripod floor mark can be paired with a recorded camera-height measurement when the setup must be rebuilt later.
These references create a reproducible reference state, but product dimensions, surface characteristics, or intentional setup changes may still require controlled adjustment.
- Product center: Mark the approved product position or alignment point so a moved product can be reset against the same placement reference.
- Tripod position: Mark the tripod's approved floor position to help reconstruct the camera-to-product relationship and framing.
- Camera height: Record the approved camera height or equivalent physical reference when it is needed to reproduce the camera position after a rebuild.
- Light-stand position: Mark each approved stand position so moved lighting can be returned to its recorded spatial relationship with the product.
- Background placement: Mark the approved background position so its relationship to the product and planned framing can be reconstructed.
Photograph the Product Set in a Repeatable Sequence
Photograph the product set in a consistent shooting sequence that follows the shot list, preserves the locked setup and moves through the product queue without rebuilding the baseline for each item.
Keep the approved positions unchanged when products can share the same setup conditions, and treat any necessary change as a deliberate deviation rather than an unrecorded adjustment.
Use the shot list to control the shooting order and planned views. Before continuing, confirm that the intended view was captured, the product matches the reference placement where applicable, and no obvious framing or focus failure requires an immediate retake.
Product size, shape, surface, or required views may require a pause and controlled setup change rather than forcing every item through unchanged conditions.
Document each deviation, reset the affected setup variables when the original baseline is needed again, and continue only after confirming the intended state.
The batch is complete when the planned views have been captured across the product queue under the same baseline or under clearly documented deviations from it.
- Confirm the locked setup: Begin with the validated product, camera, lighting, and background positions in their approved state. Check that no unintended movement has occurred before the first product enters the shooting sequence.
- Follow the product queue: Move through the products in the planned shooting order so the batch workflow remains predictable. Where products share compatible size, shape, surface, and view requirements, preserve the locked setup instead of rebuilding it between products.
- Follow the shot list: Capture the planned views for the current product in the defined order and confirm each required view before moving on. This keeps the capture sequence tied to the approved shot plan rather than memory.
- Perform a quick check: After a product or planned view is captured, check for an obvious setup change that would prevent the sequence from continuing as intended. If the baseline still holds, continue without altering the setup.
- Pause for necessary deviations: If a product requires a controlled change because its dimensions, surface, or required view differs from the current setup conditions, pause the sequence rather than making an unrecorded adjustment.
- Document and reset: Record the deviation and the setup variable that changed, then complete the required capture. When the original baseline is needed for the next product, reset the affected position or condition to its recorded reference before continuing.
- Complete the batch: Continue through the remaining product queue until every required product and planned view in the shot list has been captured, with quick checks and documented deviations preserving the intended shooting sequence.
Capture the Planned Views Before Changing the Setup
Capture and confirm all planned views for the current product against the shot list before making a setup change.
For each required view, align the angle, framing, and product orientation specified by the plan; the required views depend on the product and ecommerce requirements, so completion means covering the established shot list rather than following one universal view sequence.
Follow a defined capture order so each required view can be confirmed before moving to the next; for example, a planned front, side, and detail sequence can be completed in that order when those are the required views for the product.
This subsection covers completing the established view sequence, while product photography angles and composition address how those views are selected and composed.
- Identify the next planned view: Follow the shot list and confirm which required view comes next in the capture order so the current product's coverage can be tracked against the established plan.
- Align the product and camera relationship: Orient the product and use the angle and framing required for that planned view without treating the same orientation or angle as mandatory for every product.
- Capture and confirm the view: Take the planned image, then check that its angle, framing, and product orientation correspond to the required view before marking that part of the shot list complete.
- Complete the remaining views: Repeat the view sequence until every planned view for the current product has been captured and confirmed against the shot list.
- Change the setup only after completion: Once the required coverage for the current product is confirmed, proceed to the next item or make the planned setup change; if coverage is incomplete, remain with the current setup and capture the missing view first.
Reset Product Placement Between Items
Remove the current item, clear the shooting surface, and align the next product to the recorded reference marks before capture.
Reuse the existing product center, orientation, support position, and camera frame when the next product's footprint and geometry fit the reference state; if size, shape, orientation, or reflectivity changes the placement requirement, make and document a controlled adjustment, then reconfirm the framing.
- Remove and clear: Remove the previous product and clear the support area so leftover objects or displaced supports do not affect the next product's placement.
- Align to the reference marks: Position the next product against the recorded center point and other relevant reference marks, then compare its product footprint with the established placement area.
- Check orientation and support: Orient the product for the required view and confirm that the support position holds it in the intended reference state without forcing a product with different geometry into unsuitable marks.
- Reuse or adjust: Reuse the recorded placement when the product fits the existing geometry. When product characteristics require a different position, make the minimum controlled adjustment and document what changed before continuing.
- Reconfirm the camera frame: Check the product within the existing camera frame and confirm the required framing before capture; if the controlled adjustment changed the visible relationship, resolve and record that change before proceeding.
Verify Shot Coverage Before Breaking Down the Setup
Verify shot coverage and critical capture integrity before moving or dismantling any part of the setup.
Confirm that every required product and planned view is present and that the files are readable. If a critical capture has an obvious framing, focus, exposure or consistency failure that can be corrected during the session, recapture it while the setup remains intact rather than relying on a later rebuild.
Check product count and planned-view completion first, then confirm file presence and readability before reviewing critical focus, framing, major exposure failures, and obvious inconsistencies between captures.
These checks identify whether the shoot is complete enough to retain or whether a specific image should be recaptured or a controlled correction documented.
A visible failure does not by itself define every underlying cause, so keep the decision focused on whether the required capture can be accepted or should be retaken before breakdown.
- Product count: Confirm that every product scheduled for the shoot has a corresponding set of captures. If a required product is missing, keep the setup intact and capture it before breakdown.
- Planned views: Check each product against the shot list and confirm that all required planned views are present. Recapture a missing required view while the current setup and reference positions are still available.
- File presence: Confirm that the expected image files are present for the completed products and views. If a required capture is absent, treat the shot coverage as incomplete and recapture it before dismantling the setup.
- Readability: Open or review the captured files far enough to confirm that they can be read and inspected. A file that cannot be reviewed should not be treated as verified coverage until a usable capture is available.
- Critical focus: Check whether the product detail required for the intended use appears acceptably focused in the capture. If critical focus is visibly missing, recapture the affected view while the camera and product relationship can still be restored.
- Framing: Confirm that the required product view is contained within the intended frame without an obvious crop or alignment failure. If framing is visibly inconsistent with the planned view, correct and recapture it before moving the setup.
- Major exposure failure: Identify captures that are visibly too bright or too dark to serve the intended review or use. Treat the exposure failure as a reason to inspect the relevant capture or illumination condition and recapture where necessary rather than applying a universal pass-or-fail threshold.
- Obvious inconsistency: Compare related captures for clear unintended differences in product placement, camera framing, lighting position, or background appearance. If the inconsistency reflects an accidental setup change, restore or document the controlled correction and recapture the affected image before breakdown.
Once the required coverage is present and the critical captures are retained or recaptured, the setup can be broken down; broader product photography mistakes to avoid are a separate review topic.